Overhead Garage Storage Racks: FlexiMounts 4x8 vs 3x8 and How to Install One
How ceiling garage storage racks mount to joists, how to set the drop to clear your garage door, 750 lb ratings, install steps and FlexiMounts 4x8 vs 3x8.
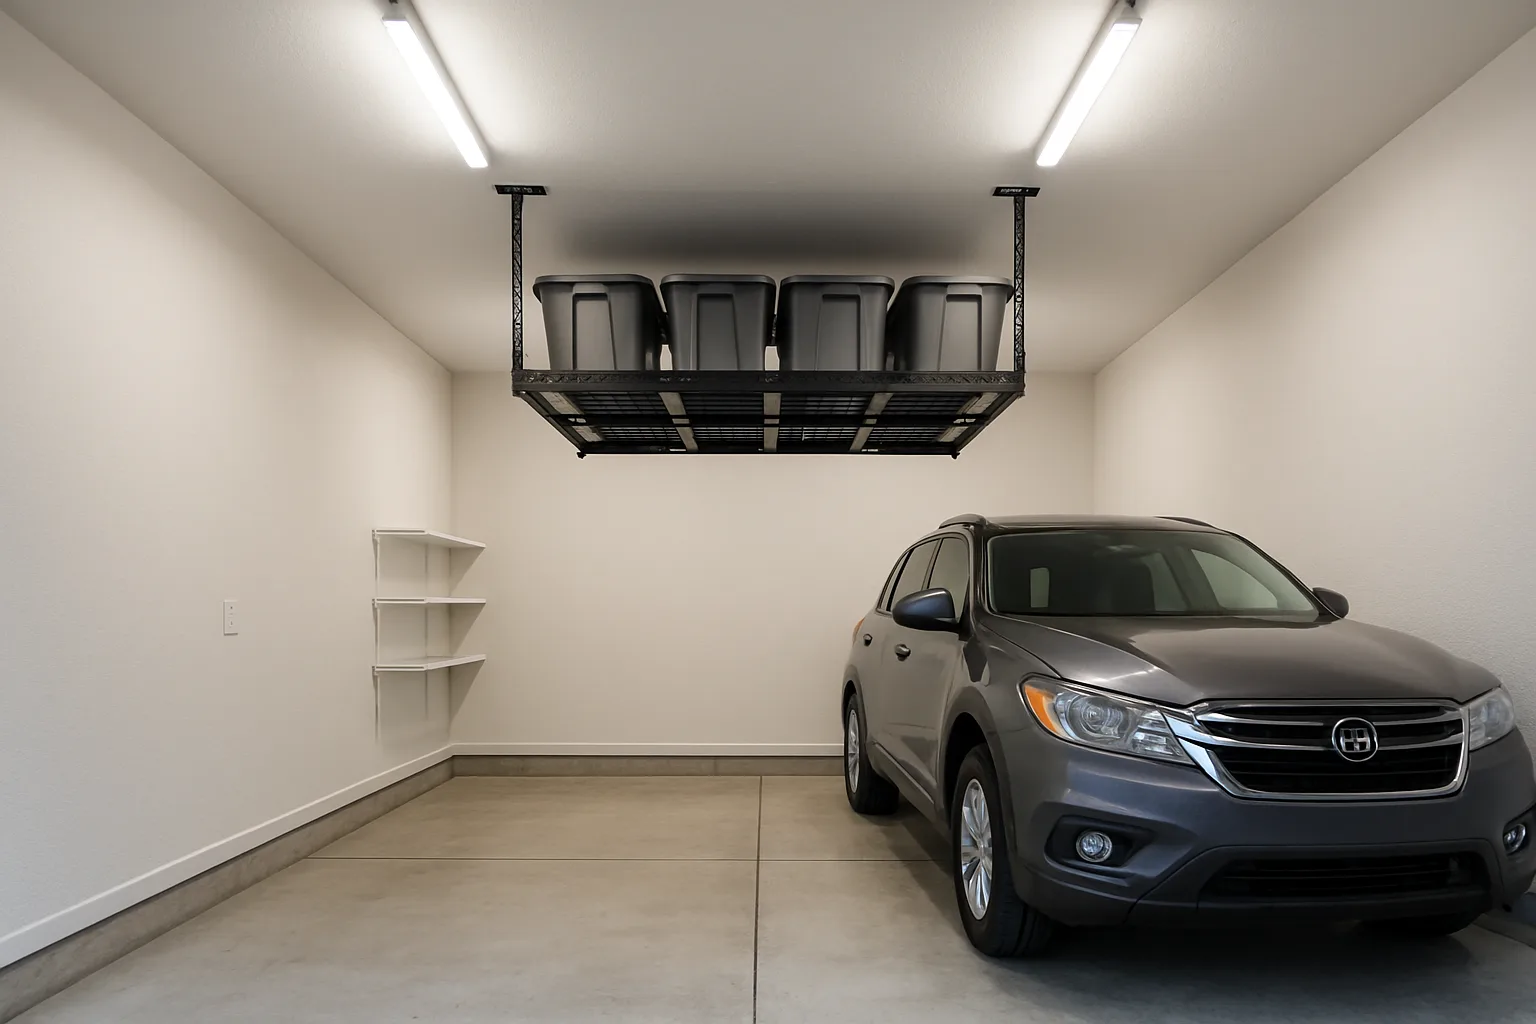
Most garages have empty space between the parked cars and the ceiling. An overhead storage rack turns it into a shelf for bins, seasonal gear and anything that doesn't need to live on the floor. The rack bolts into the ceiling joists, hangs on adjustable posts, and holds a steel wire deck at whatever height clears the garage door and the vehicles below it.
This guide covers the FlexiMounts 4x8 and 3x8 racks, two tools that make the install easier, how the racks mount, how to set the drop height, and the mistakes that cost time on the ladder.
As an Amazon Associate, Best Utah Real Estate earns from qualifying purchases.
Quick verdict
- Most storage from one rack: the FlexiMounts 4x8 Overhead Garage Rack. A 4 by 8 ft deck, a drop of about 22 to 40 in, a 750 lb rating, and six hooks in the box.
- A narrower spot or a second rack along a wall: the FlexiMounts 3x8 Overhead Garage Rack. Same 8 ft length and 750 lb rating, one foot narrower. Hooks are sold separately.
- The ladder: a Little Giant Ladder is light enough to move bracket to bracket, which matters on a job with dozens of trips up and down.
- The one tool to add: a GEARWRENCH 13 mm Ratcheting Wrench. The lag bolts and post nuts are 13 mm, and a ratcheting wrench is much faster than the small tool in the box, especially close to a wall.
The picks side by side
| Product | Shop | Job | Size | Rating | Worth knowing |
|---|---|---|---|---|---|
| FlexiMounts 4x8 Overhead Garage Rack |  Buy on Amazon | Ceiling rack | 4 x 8 ft deck, 22 to 40 in drop | 750 lb | Six ceiling brackets; six hooks included |
| FlexiMounts 3x8 Overhead Garage Rack |  Buy on Amazon | Ceiling rack | 3 x 8 ft deck | 750 lb | Six ceiling brackets; lag bolts and hardware included; hooks sold separately |
| Little Giant Ladder |  Buy on Amazon | Install ladder | Sized to reach your ceiling | 18 ft reach (Velocity model) | Light enough to reposition for each of the six brackets |
| GEARWRENCH 13 mm Ratcheting Wrench |  Buy on Amazon | Install tool | 13 mm | n/a | Fits the lag bolts and post nuts; works in tight spots near a wall |
How a ceiling rack mounts
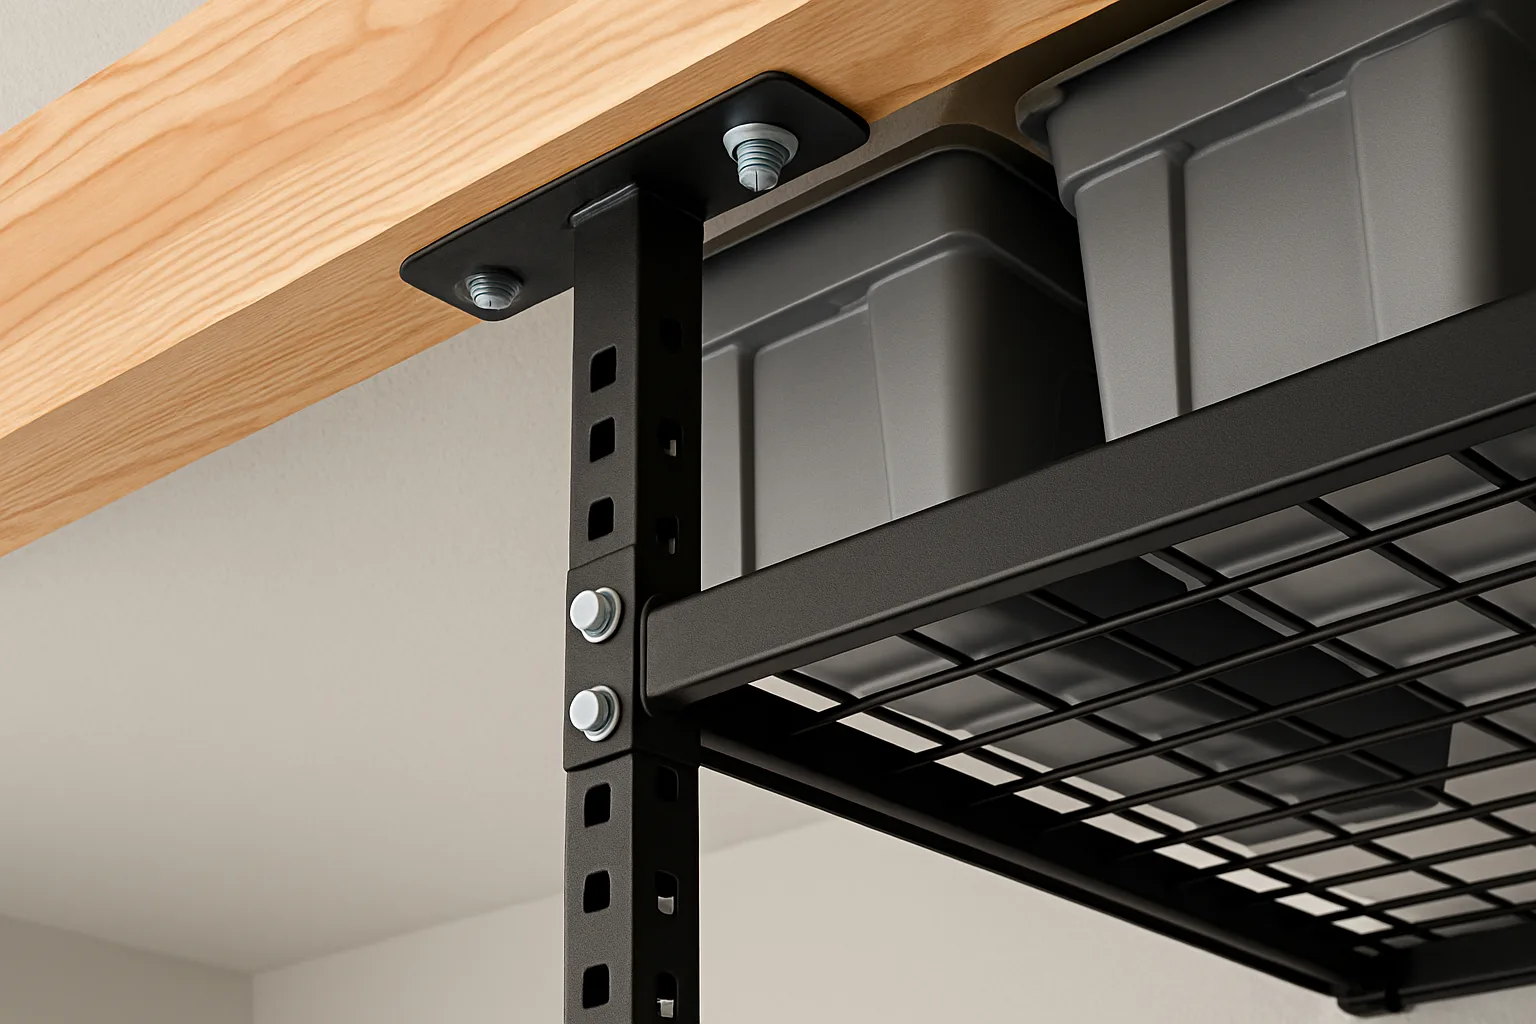
A ceiling rack is only as strong as its connection to the framing above the drywall. Each FlexiMounts rack uses six ceiling brackets, three per long side, and each bracket takes two lag bolts driven into a ceiling joist. The brackets on each side sit 48 in apart on center, which lines up with the 8 ft length of the deck. Vertical posts then hang from the brackets, and the wire grates bolt to the bottom of the posts.
The key rule: the lag bolts go into wood, not just drywall. In many garages the drywall screw lines show exactly where the joists run. If the ceiling has been patched or painted over, use a stud finder and confirm each spot before drilling. A pilot bit that breaks through into nothing has missed the joist; move the bracket rather than trusting the bolt. For a concrete ceiling, check the listing for concrete-anchor hardware before buying, since the standard kit is built around lag bolts into wood joists.
Each bracket has room along its length to place the post anywhere between its two lag bolts. Putting the two bolts as far apart as the bracket allows gives the most choice when lining up the posts later. A post can't hang outside the two bolts, so plan that spacing before the bracket goes up.
Setting the drop height: garage door and opener clearance
The vertical posts set how far the deck hangs below the ceiling. On the 4x8, the drop adjusts from 22 to 40 in. A longer drop holds taller bins but reaches farther toward the cars, the open door and the opener rail.
Before cutting anything loose from the box, measure from the ceiling down to the lowest thing the rack must clear: the top of the open garage door, the opener and its rail, a tall vehicle or roof box, and any wall cabinets. A 27 in drop, for example, can clear both wall cabinets and the open door, but measure your own garage before setting the posts. Then account for the height of the bins on top of the deck. A rack that clears the door with an empty deck but not with bins stacked on it is an easy mistake to make.
A rack over the door's travel path has to clear the door fully open, not just closed. Racks often fit best beside the door track or toward the back of the garage. For how chain, belt and wall-mount openers change the space above the door, see this garage door opener comparison.
What to store up there (and what not to)
An overhead rack works best for things used a few times a year: holiday bins, camping gear, extra household items, coolers and off-season sports equipment. A boxed artificial tree or a tree in a tree storage bag is a natural fit for a 4x8 deck.
Keep everyday items low, put the heaviest bins near the posts, and spread the load across the deck. The weight rating assumes every lag bolt is in a joist; fix a missed joist or loose bolt before loading.
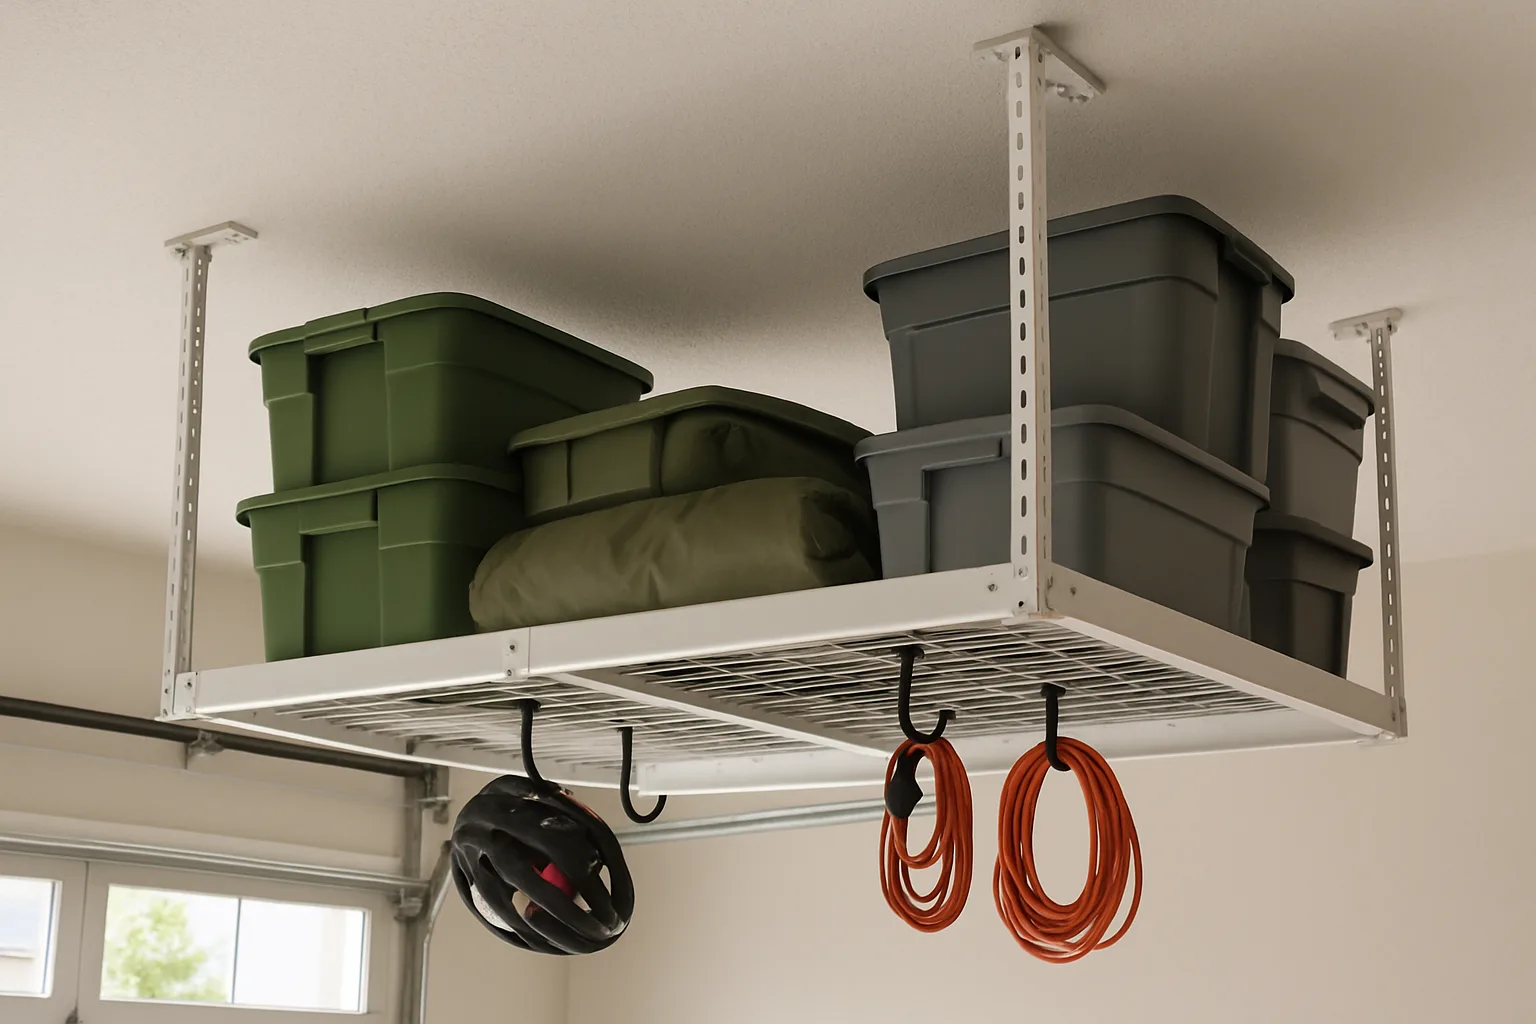
The hooks that come with the 4x8 add storage below the deck. The utility hook bolts to a post with the included hardware and a 13 mm wrench, and the four flat hooks loop up and over the wire grid anywhere along it. The flat hooks barely budge under a hard pull and suit cords, folding chairs or a hose.
Install steps and tools
Tools that make the job easier: a drill with a bit sized for the lag bolts, a 13 mm socket or ratcheting wrench, a 5 mm hex bit on a drill for the grate bolts, a tape measure at least 8 ft long, a marker or pencil, a stud finder, a utility knife, and a stable ladder. A laser line is optional, a tool belt saves trips down the ladder, and a dozen standard washers under the lag bolt heads add a bit of security. The kit's own wrench and hex tool work, just slowly.
- Unpack and sort the hardware. The FlexiMounts bags are numbered by step. Sort the brackets by shape (end, straight 90s, and center pieces with an extra lip) and read the manual first.
- Mark and mount the first row of ceiling brackets. Hold a bracket on the ceiling, mark the joist through its holes, drill pilot holes, and drive two lag bolts. In a corner, keeping the brackets about 4 in off the wall leaves room to work.
- Space the rest at 48 in on center. Measure from the middle of the installed bracket to the middle of the next. Double-check all three before moving on.
- Mount the opposite row. The second row faces the opposite direction, set the rack's width away (3 ft for the 3x8). A scrap board cut to the exact width works as a quick spacing jig.
- Build the vertical posts. Set each post to the chosen drop, with one bolt on each side of the joint for stability. The square side of the bolt goes in first, and the nut goes on the round-hole side. The nuts have a plastic thread lock, so they tighten slowly by design.
- Hang the posts. Each post hangs between a bracket's two lag bolts, 48 in from the next. Start each nut by hand, then tighten with the 13 mm wrench.
- Assemble the grates upside down. The 8 ft deck comes in four 2 ft sections. Flipped upside down, the connecting bolts and L-shaped braces are easy to reach with the 5 mm hex.
- Lift and bolt the deck. The grates slide into clips on the posts and bolt in place: one bolt at each corner and two at the center posts.
The hardest part: lifting the deck alone
The FlexiMounts instructions call for two people, and lifting the deck is why. Nothing holds the grate in place until it's bolted, and a full 8 ft panel is heavy. Trying to balance one end while bolting the other can end with the panel sliding off and dropping, which is a real risk on a ladder.
Two workarounds help a solo installer. First, lift half the deck at a time: join two of the 2 ft sections into a 4 ft panel, bolt it up, then hang the next posts and add the second panel. The second half goes easier because the first half holds it in position. Second, give the panel a temporary ledge. Clamping a scrap board across the hanging braces creates a shelf for one end to rest on while the other end gets bolted. Tall cabinets underneath can do the same job. A second person is still safer.
Wobble and how to stiffen a rack
The 3x8 holds an adult hanging from it once installed, but a rack on long posts can feel a little wiggly side to side. Mounting it close to a wall and anchoring it into the wall framing steadies it. Recheck every lag bolt and post nut after the first load and now and then after that.
The picks in detail
FlexiMounts 4x8 Overhead Garage Rack
The 4x8 is the size most garages should start with. The deck is 4 ft by 8 ft (96 in long), and the drop adjusts from 22 to 40 in. FlexiMounts rates it for 750 lb and says it was load-tested to 1,200 lb. The bolts and nuts are good quality, and the finished rack feels solid with gear on it. The kit includes six hooks for hanging things under the deck. One person can install it with cabinets or a ledge to lean the deck on, but a helper makes the deck step much easier.
FlexiMounts 4x8 Overhead Garage RackCheck today’s price on Amazon

 Buy on Amazon →
FlexiMounts 3x8 Overhead Garage Rack
The 3x8 uses the same six-bracket, 48 in on-center layout and the same 750 lb rating on a deck one foot narrower. It fits beside a door track, over a narrow side bay, or as a second rack; two can run in an L shape along the back and side walls. The box includes lag bolts for wood joists (check the listing for concrete-ceiling hardware) and a paper drilling template. Marking holes with the bracket itself is easier than using the template. It feels a little wiggly when hung away from walls, so it's best placed close to one where it can be anchored for extra steadiness.
FlexiMounts 3x8 Overhead Garage RackCheck today’s price on Amazon

 Buy on Amazon →
Little Giant Ladder
Installing a ceiling rack means climbing up and down for every bracket, post and bolt. A lightweight ladder that's easy to carry from one spot to the next keeps the job moving and makes it less tempting to overreach. Move the ladder rather than leaning out; OSHA's ladder safety guidance covers the basics.
Little Giant LadderCheck today’s price on Amazon

 Buy on Amazon →
GEARWRENCH 13 mm Ratcheting Wrench
On the 4x8, every lag bolt, post nut and hook bolt is 13 mm. The tool in the kit works, but a ratcheting wrench speeds up the many bolts considerably, and a slim one fits where a drill won't, such as a bracket set a few inches from a wall. Pair it with a 5 mm hex bit in a drill for the grate bolts. For choosing between a drill and an impact driver for the lag bolts, see the drill vs. impact driver guide.
GEARWRENCH 13 mm Ratcheting WrenchCheck today’s price on Amazon

 Buy on Amazon →
Who should buy which
- One rack for the most storage: the FlexiMounts 4x8, set to the shortest drop that holds your bins.
- A tight spot, a side bay or a second rack: the FlexiMounts 3x8, ideally against a wall so it can be anchored.
- Installing solo: either rack, plus a lightweight ladder, a 13 mm ratcheting wrench, a scrap board and two clamps for a temporary ledge.
Posted by Kristopher Larson
Frequently asked questions
How do overhead garage storage racks attach to the ceiling?
Ceiling brackets bolt into the joists above the drywall, typically with two lag bolts per bracket, and adjustable posts hang down from the brackets to hold the wire deck. A FlexiMounts 4x8 or 3x8 rack uses six brackets spaced 48 in on center. The bolts must go into solid wood; drywall alone can't carry the load. Concrete ceilings need concrete anchors instead of lag bolts.
How much weight can an overhead garage rack hold?
The FlexiMounts 4x8 and 3x8 racks are both rated for 750 lb, and FlexiMounts says they are load-tested to 1,200 lb. That rating depends on a correct install, with every lag bolt in a joist and every nut tightened. Spread the weight across the deck and keep the heaviest bins near the posts.
How far down should an overhead garage rack hang?
Hang it only as low as the lowest thing it has to clear allows: the open garage door, the opener and its rail, wall cabinets and the tallest vehicle. The FlexiMounts 4x8 adjusts from 22 to 40 in below the ceiling. Remember to leave room for the bins on top of the deck, not just the deck itself.
Can one person install an overhead garage storage rack?
It can be done, but FlexiMounts' instructions call for two people because the deck is heavy and nothing holds it up until it's bolted. Solo installers can lift the deck in two 4 ft halves and clamp a scrap board across the hanging braces as a temporary ledge. A helper is still the safer option.
What tools do you need to install a garage ceiling rack?
A drill with a bit for the pilot holes, a 13 mm socket or ratcheting wrench, a 5 mm hex bit for the grate bolts, a tape measure at least 8 ft long, a pencil or marker, a stud finder and a sturdy ladder. A laser line and a tool belt are helpful extras. The tools included in the kit work but are slow.
Which is better, a 4x8 or 3x8 overhead garage rack?
A 4x8 gives the most storage from a single rack and suits an open stretch of ceiling. A 3x8 fits narrower spaces, such as beside a door track or along a side wall, and works well as a second rack in an L shape. Both FlexiMounts sizes are 8 ft long and rated for 750 lb.
Keep reading
More from the blog
Best Air Compressor for a Home Garage: Quiet, CFM and Tank Size Explained
Best LED Garage Lights: Deformable Screw-In vs. Shop Lights, by Measured Brightness

How to Choose a Garage Heater: Propane vs. Electric vs. Mini-Split